Start building
In these tutorials, we'll introduce core concepts by evolving a checkout system, starting with a barebone setup and adding adapters step by step.
Steps
1. Basic Checkout
We'll manually create a checkout, building the order from scratch. Although this approach isn't recommended for real-world implementations, it introduces the order structure, such as customer information, shippings, payments, and state.
2. Non-PSP adapter
Here, we'll introduce our first adapter, the Non-PSP adapter. You'll learn how to configure this adapter, which simplifies the process compared to handling payments manually. We'll explore interacting with an adapter and how a payment adapter can drive order states.
3. Norce adapter
Next, we'll cover the Norce adapter, which integrates Norce Commerce with Norce Checkout. With two adapters in play, you'll learn how they synchronize using hooks and notifications.
4. PSP adapter
Then we'll replace the Non-PSP adapter with a PSP adapter. We'll explore how external provider callbacks work and how they interact with hooks and notifications to keep all adapters in sync.
5. Events
As a bonus step we'll look at how to set up completely custom events. When something changes, use notifications to get informed!
You'll learn how to
- Use the order API for cart, customer, shipping, and payment details.
- Explore order states.
- Configure adapters using the configuration API.
- Interact with adapters.
- Understand how adapters communicate via hooks and notifications to stay synchronized.
Sample merchant
In some tutorials, examples are easier to understand with merchant data. We'll use Things & Stuff, a merchant operating on a platform outside Norce Commerce. The goal is to map their cart to Norce Checkout, create an order, and enrich it with customer details, shipping options, and payments before completing the order.
| Name | Merchant / Slug | Channel | Token |
|---|---|---|---|
| Things & Stuff | thingsandstuff |
se |
super-secret-and-valid-token |
Remember to replace these values with your own when testing.
Follow along
You can follow along in these tutorials using Bruno and our Checkout Collection. You can find similar requests to those used in the tutorials structured by core service or adapter, but there is also a tutorials folder where you can find each request used in these tutorials in order.
Checkout Collection + bruno
The best information about how to use bruno can be found here.
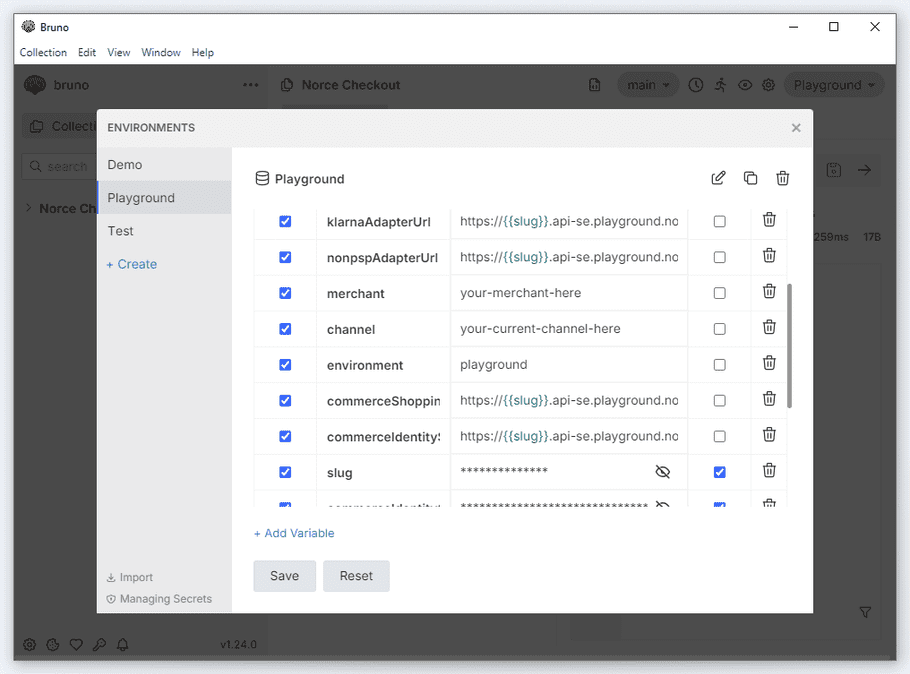
Once you've opened the Checkout Collection in bruno you can select your environment in the top right corner. Choose Playground if it is not already selected, and then open up the drop down again to select Configure. Here you'll see a list of all our environment variables, some you can leave as they are like the service URLs (eg. orderUrl), others you need to change and some are set to secret with no values the first time you open this collection.

Required fields for any request towards Norce Checkout:
-
merchant
set to your merchant, eg.
thingsandstuff. -
channel
set to something relevant to what you're doing, eg.
se. -
slug
set to your slug, most likely same value as your merchant, eg.
thingsandstuff. -
token
set to your Norce Checkout token, eg.
1AA1Aa1A111aAaAA+1aaaa1aAaaaAaaAaaAaAa1AAaa=.
If you're going to use Norce Commerce and the Norce adapter:
-
commerceClientId
set to your Norce Commerce Client id, eg.
1234. -
commerceApplicationId
set to your Norce Commerce Application id, eg
2345. -
commerceIdentityClientId
set to your Norce Commerce identity client id, eg.
ca11ab1e-c0de-ca11-c0de-ca11edca11ed. -
commerceIdentityClientSecret
set to your Norce Commerce identity client secret, eg.
ca11ab1e-c0de-ca11-c0de-ca11edca11ed.
And to use the Klarna adapter in Norce Checkout:
-
klarnaUsername
set to your Klarna username, eg.
ca11ab1e-c0de-ca11-c0de-ca11edca11ed. -
klarnaPassword
set to your Klarna password, eg.
klarna_test_api_1AA1Aa1A111aAaAA+1aaaa1aAaaaAaaAaaAaAa1AAaa
Once you click "Save" the urls should be updated to include your slug and you can make requests using this environment.